For those of us who have been around printing a while, one key lesson that's never forgotten is the need to plan print jobs starting at the end of the line—with bindery and finishing. That's especially true when it comes to designing, printing, and binding thick saddle-stitched books. There are three problems that can surprise printers. Yet they are easy to avoid when the job is planned "backwards."
The three potential problems with thick saddle stitched books are:
1. Insufficient internal margins
2. No allowance for creep
3. Nicked spines when trimming
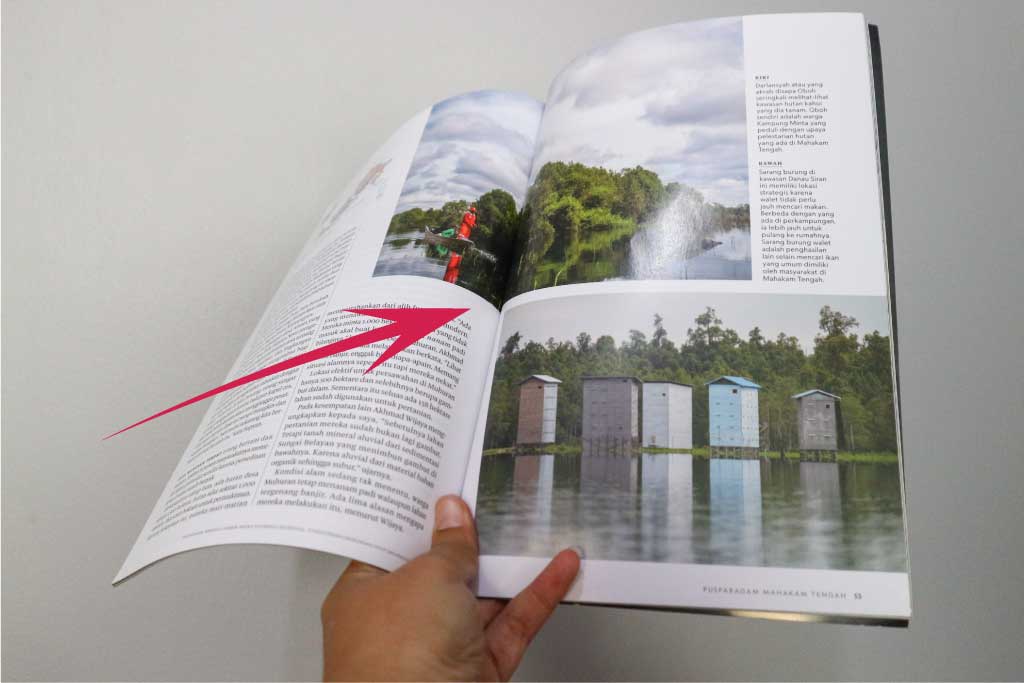
1 - Internal margins
Thick saddle stitched books don't lay flat when opened. So design elements or text can disappear into the internal margins near the spine. You can check for this by making a saddle stitched book mockup (dummy) using the actual paper to be used for the job. Allow plenty of safe space and make adjustments to prevent critical text, images, or design elements from disappearing into the spine.
2 - Allowance for creep
Creep, sometimes called "pushout," is the distance that each sheet in the book is moved away from the spine towards the face trim (image below).
For example, if each sheet is .004" thick, each subsequent sheet, starting at the spine, gets .004" closer to the trim. The image below shows two sheets to illustrate the concept. If you have a 64pp self-cover, think of it as 16 4-page sheets. When stitched and folded, the center spread is pushed out from the spine by at least 16 x .004 = .064" (1/16").
If there are borders or internal elements that need to line up, these are lost. Elements close to the edge risk being trimmed.
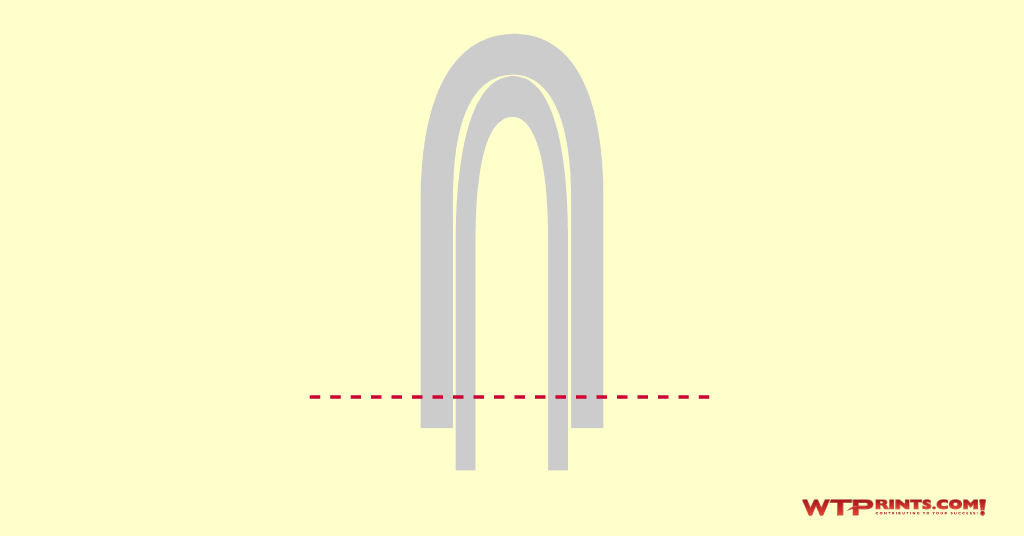
Top view of stitched book that illustrates creep.
All design software has a built-in function to figure this out and automatically compensate for creep. Also, as with internal margins, be sure to allow plenty of safe space. Of course, we always check for this, but you want to avoid extra prep time having to fix the files.
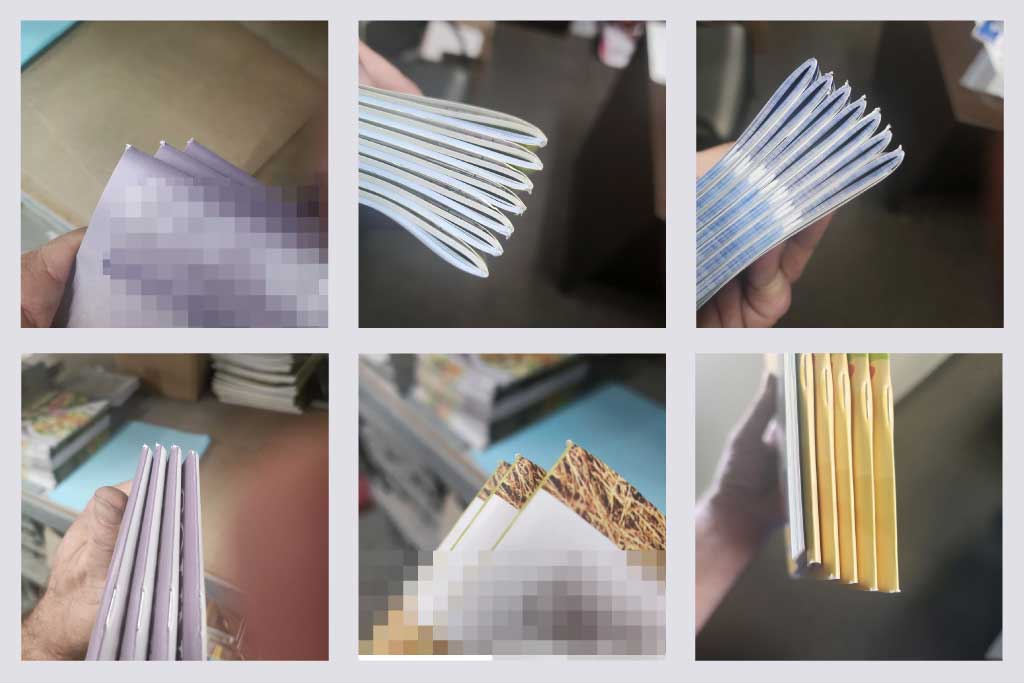
3 – Nicked edges at the spine
As the thickness of a saddle stitched book approaches 1/4", it's very likely that the top and bottom of the spine will nick at the edge (photos below.) It's an unavoidable physical limitation of the binding method. The severity of nick depends on the book's thickness, the paper, and grain direction. Different colors can also have an effect.
Solutions for a Nicked Spine on Thick Saddle Stitched Books
There are a few things to do when it comes to avoiding a nicked spine on a thicker publication.
Do a mockup (dummy)
When in doubt, it always pays to do physical mockups (dummies) using the actual paper for the job. Folding, stitching, and trimming will give you a good indication of how bad the nick will be.
Consider perfect binding
If it fits the budget, perfect binding is a good alternative, especially for premium publications. The squared edge of a perfect bound book supports the spine during trimming and eliminates the nick.
Reverse the imposition
If the nick is going to appear on the front of the book, reverse the imposition. When it's run on the stitcher with a low folio lip, it will jog to the foot and the knives will trim so the nick is on the back.
Grain direction
Try the opposite grain direction. It may not eliminate the nick, but it might minimize it.
Trim on the guillotine cutter
Guillotining a book is obviously a more tedious, expensive solution than inline three-knife trimming. But it might salvage a job. Or if you just need a few good production samples without the nick, the guillotine might be the solution.
The traditional guillotine method is to do the 3 trims on a handful of books at a time. The nick won't disappear, but there is a slim chance it might be better, depending on how many books are trimmed at a time.
Another guillotine method to try is therelief cut. A relief cut is done on the head and foot. For example, if there is 1/8" trim, do the first cut to trim 1/16" off the foot, then trim off the remaining 1/16" for the final trim. Do the same for the head trim.
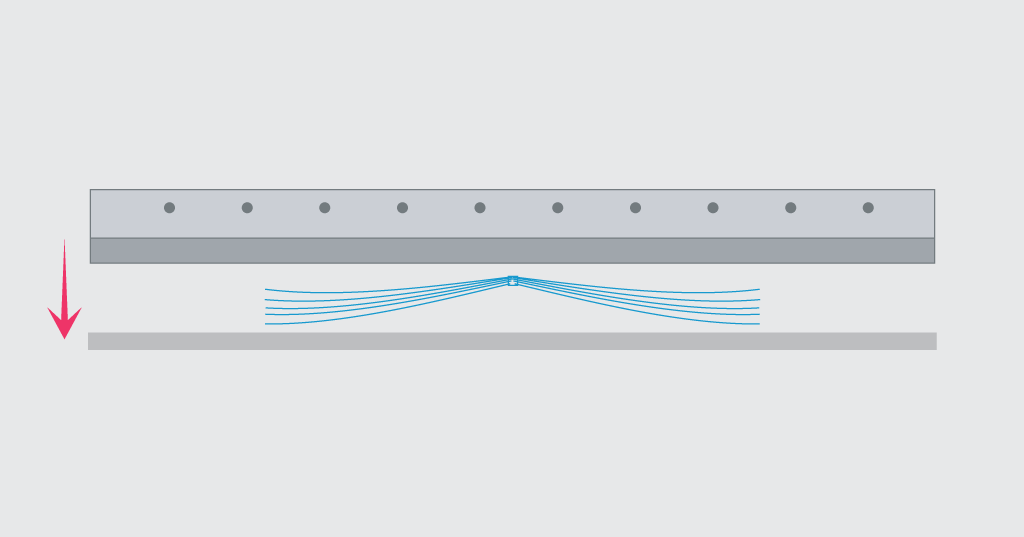
An alternative solution is to open the books to the center spread so it lays flat with the cover on top and the center spread on the cutter table (image below). Next, trim the foot and head. This will eliminate the nick, but you're only doing one book at a time for the head and foot trims. Finally, close the books for the face trim.
The bottom line – if your clients are planning a thick saddle stitched book, take a careful look before going to print.
If you need some help planning a saddle stitched book, give our estimating department a call at (559) 251-8595 ext. 1.